Do you want to root Mi6? yep, you heard it right. In today’s guide, we will explain to you how to root Xiaomi MI6 (
All this happens only from the hard work of cafface a member from Xda. He Ported the TWRP Custom Recovery for Xiaomi MI6 (sagit) Unofficially. So, We can expect Some bugs in the Present built until Official TWRP come Out. It will be rectified, in furtherly and to know about the new updates stay tuned to our blog we will update the post accordingly.

Mi6 is the latest Flagship device from Xiaomi. This is one of the most Powerful Phone Powered with the
A budget-friendly Smart
Contents
How to Root Xiaomi MI6 (sagit) and Install TWRP
Before proceeding furtherly you need to know about Bootloader and How to unlock the bootloader of the Xiaomi Phone. It’s a
After Successfully Unlocking Bootloader of Xiaomi MI6. Now, you are very close to root your Android device. All you need is Custom Recovery and Super Su or Magisk to flash. Here is the Step by Step process shown below. Please carefully follow our guide to Install TWRP. If you do anything wrong you will be ended with Brick your device. That was the real pain I have experienced with my device when it got bricked. It took nearly 3 days to get back my device in the normal condition after doing a lot of research.
Disclaimer
Unlocking Bootloader tends to lose support from the Xiaomi Customer services. we are not responsible if anything goes wrong with your device. Do this process only with your own Risk. You needn’t worry about the software updates, they will be updated even if your mobile is rooted. But you will lose brand warranty from the Xiaomi.
Requirements
- At first, you need to Unlock Bootloader of Xiaomi MI6. (search on google until we will update the Guide)
- Backup your whole data to your computer. This Process may cause the full wipe of device internal memory.
- Maintain 50% to 70% of Charging. It may be helpful if the
device gets bricked. - USB debugging enabled on your device.
Downloads
- ADB fast boot Driver for Windows
- TWRP v3.1.1.0 for MI6 ( Install TWRP MI6.Zip)
- Magisk – Systemless Soot (Copied to MI6)
- no-verity-opt-encrypt-5.1.zip for Mi 6 (Copied to MI6)
How to Install TWRP on MI6 (sagit)
- At first, you need to enable the
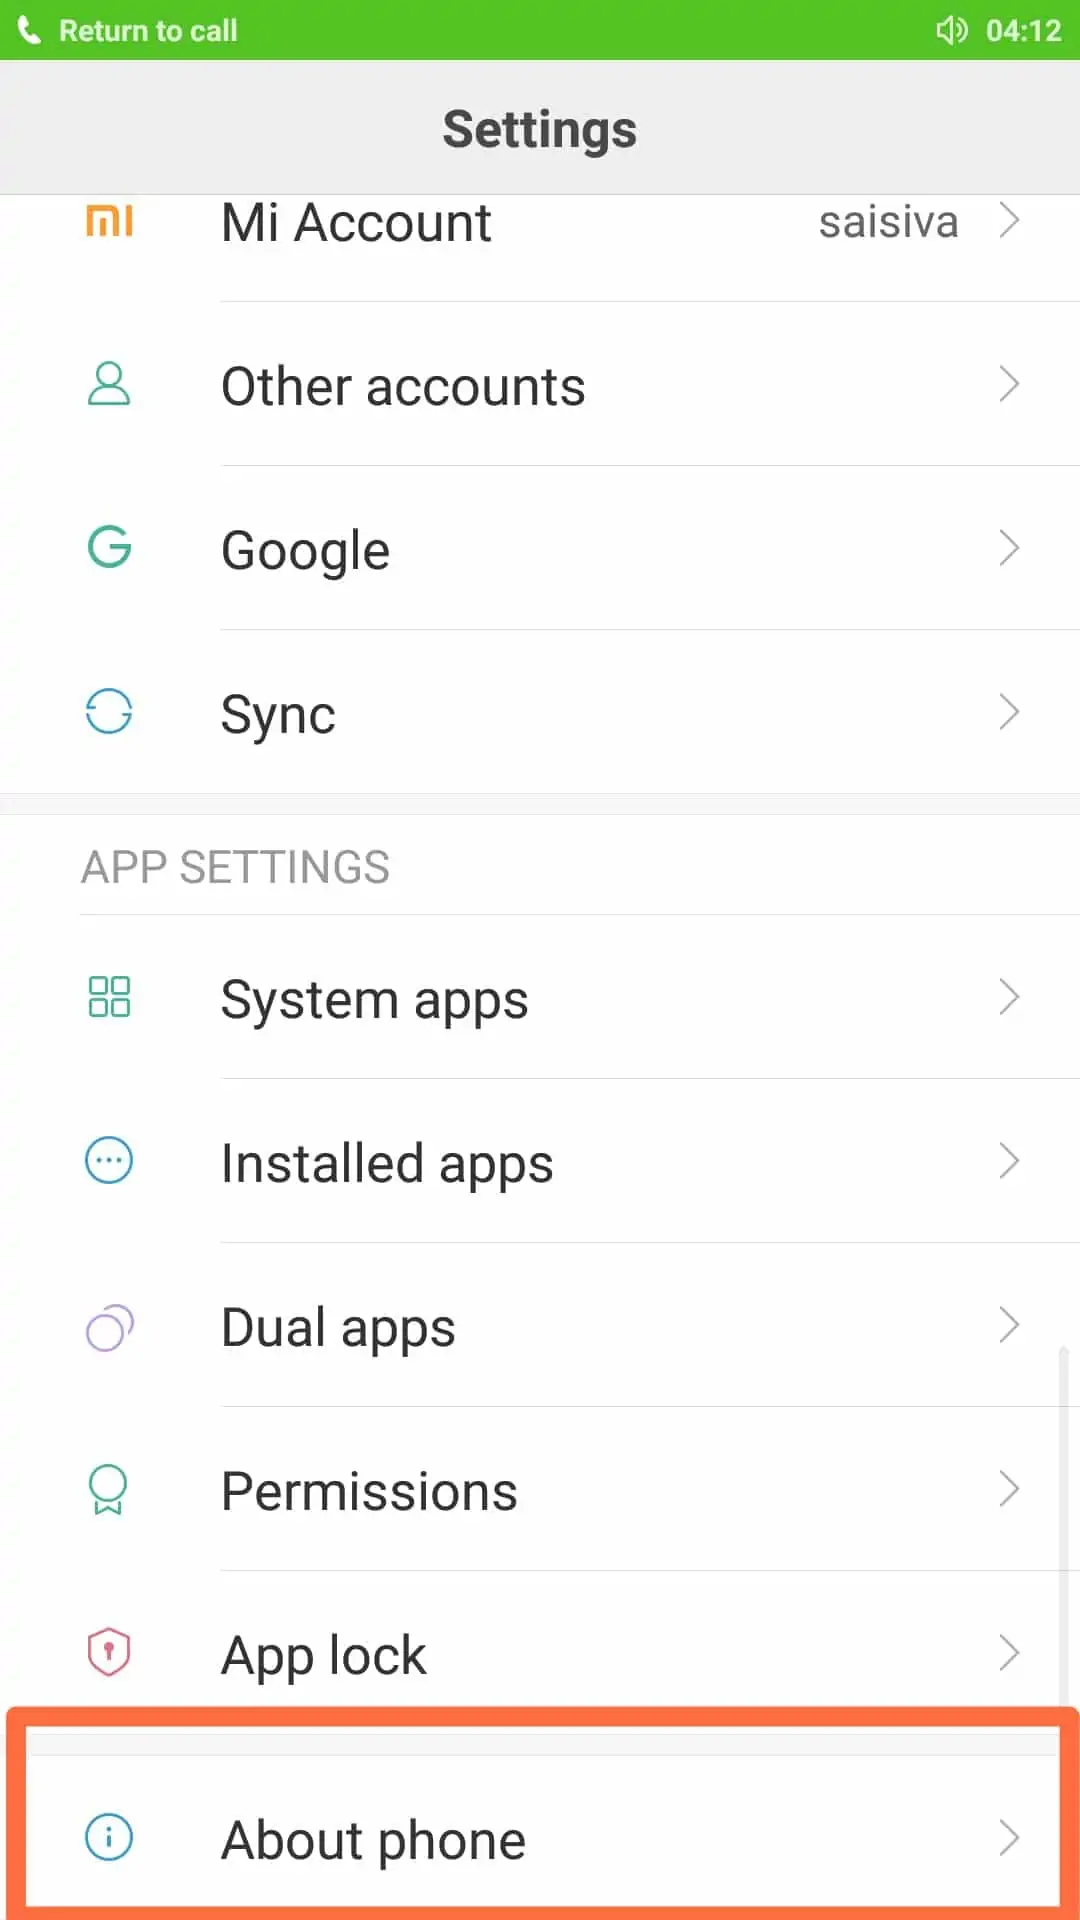
USB debugging option on settings. Open the system settings and scroll down to About phone option.
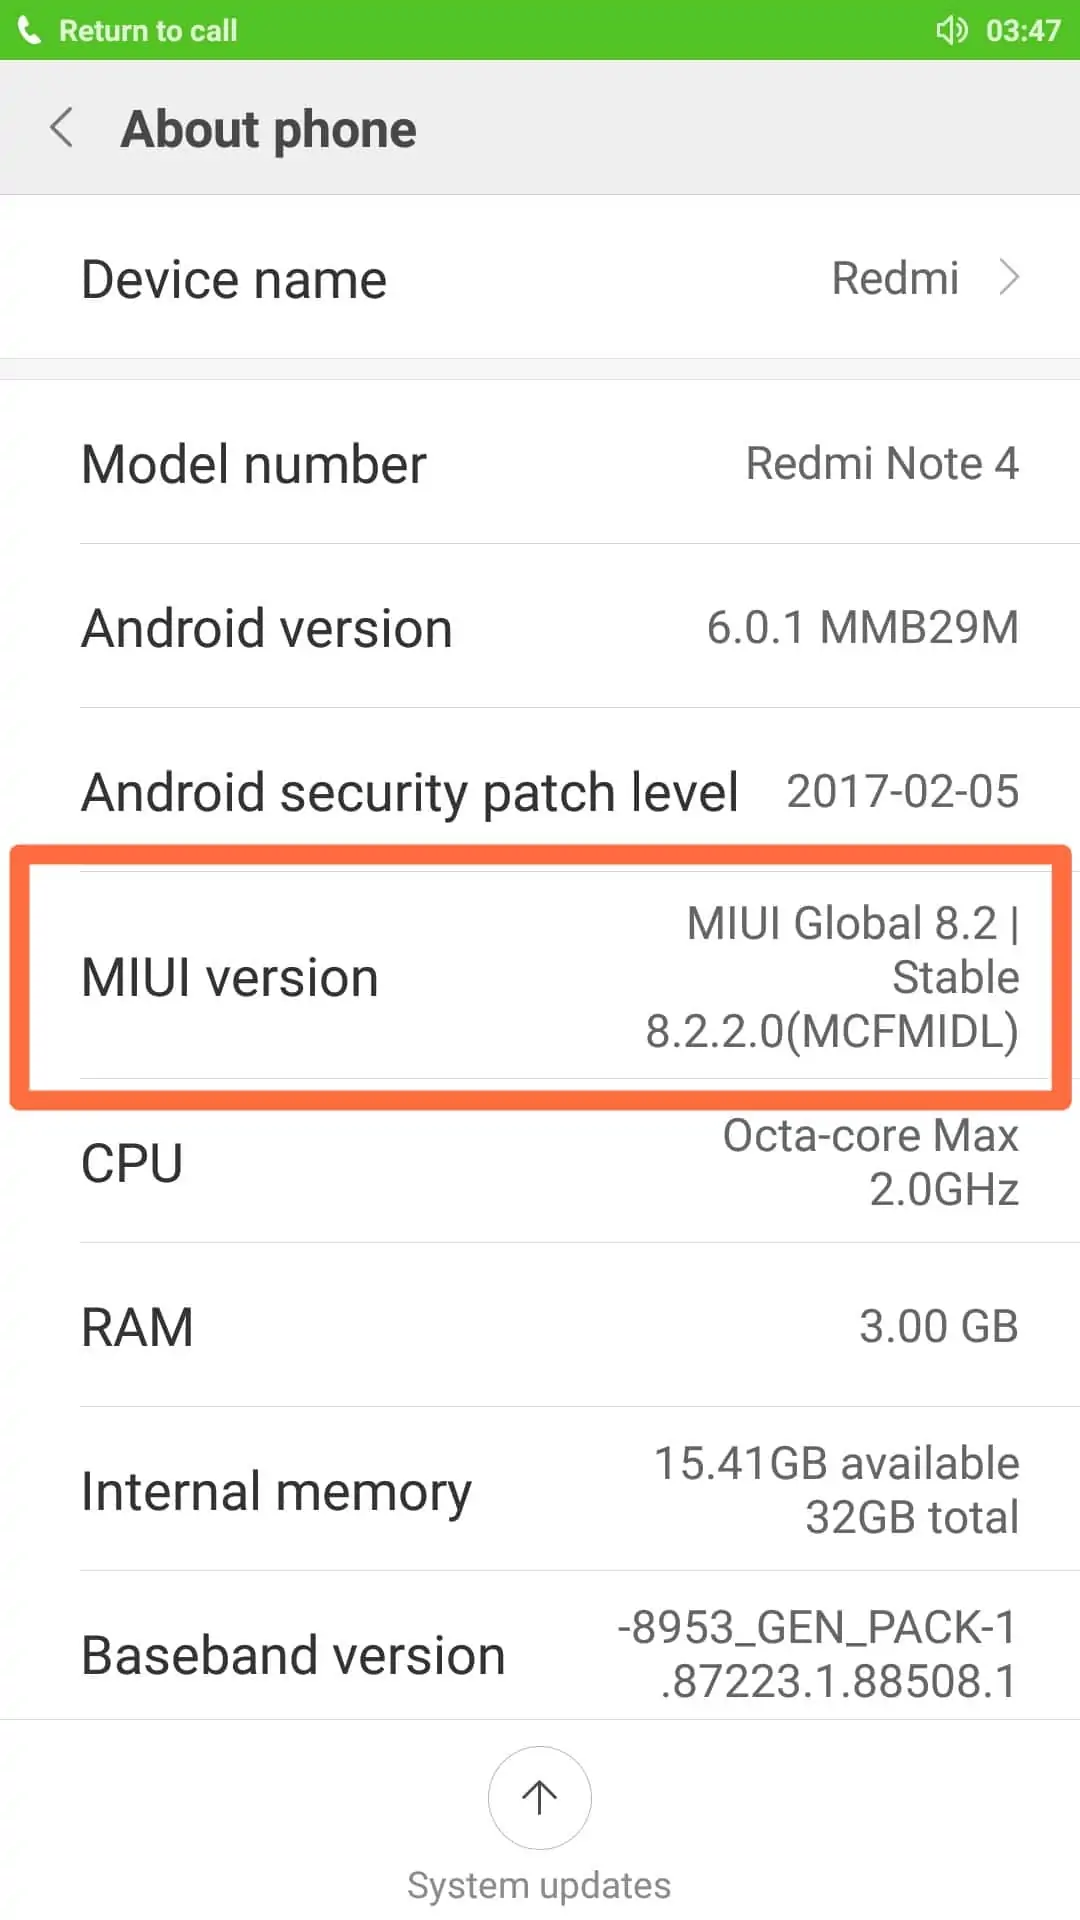
- Now, Locate the MIUI version and tap on it about 8 times. you will get a message that shows you are now a developer.
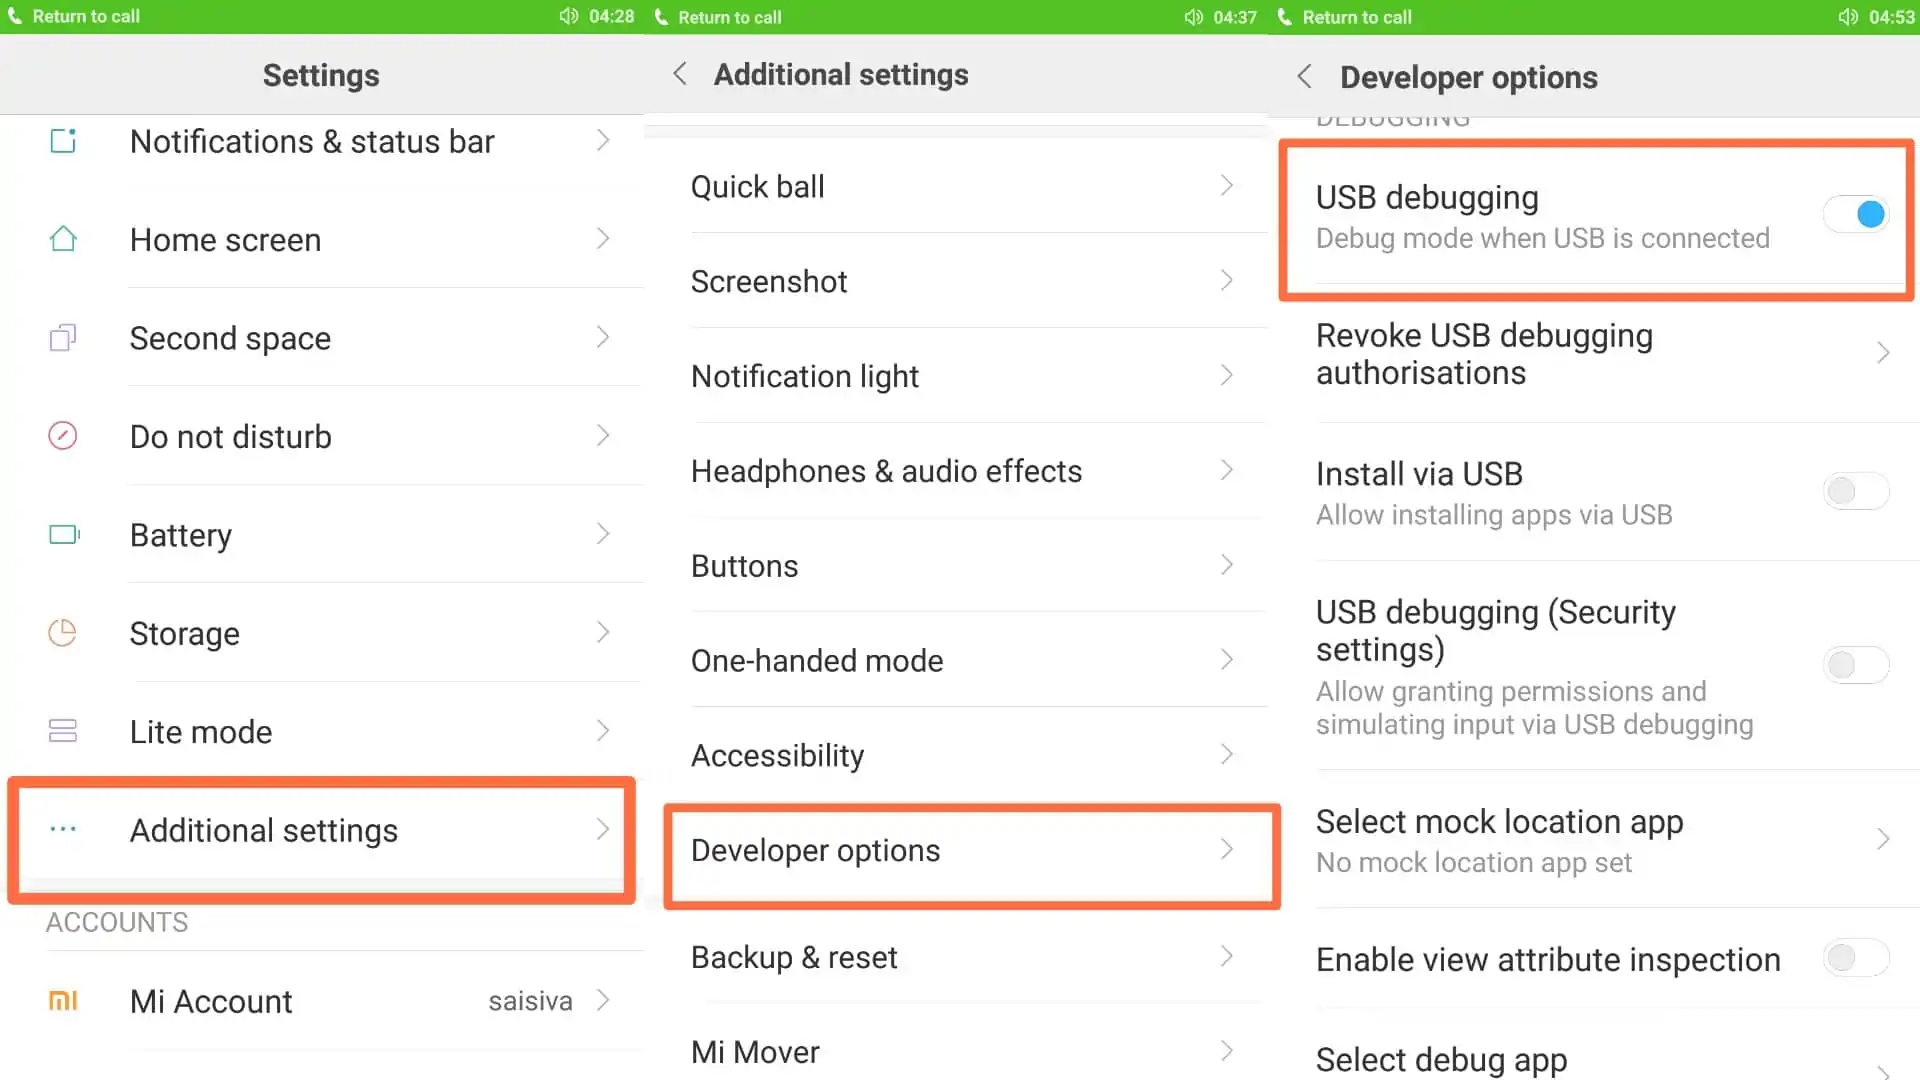
- Go back to main settings and head over to additional settings and scroll down to find developer options. Select USB debugging
- Install ADB Fastboot drivers on your Computer.
- Open the Downloaded Install TWRP MI6.Zip file and Extract on your desktop.
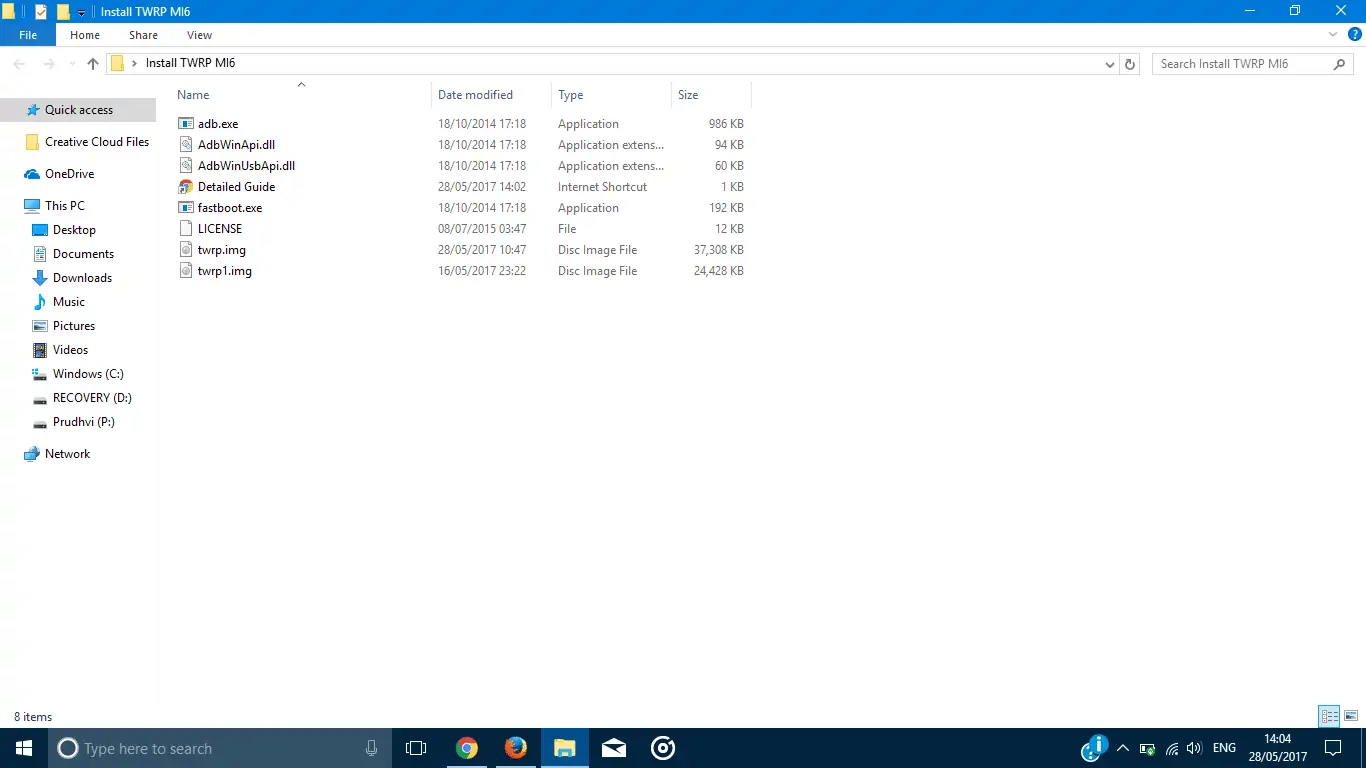
- Press and hold the Shift Button and Right-click on the free space on the Extracted Folder to open the Command Window.

- Select Open Command Window here Option.
- Switch OFF your device and Switch your device to Fastboot Mode by Press and hold the Power button and Volume down Button.
- Now, time to Connect Your Phone to the computer Via USB Cable.
- Check your MI6, Is that connected to the
computer perfectly or not by typing below command.
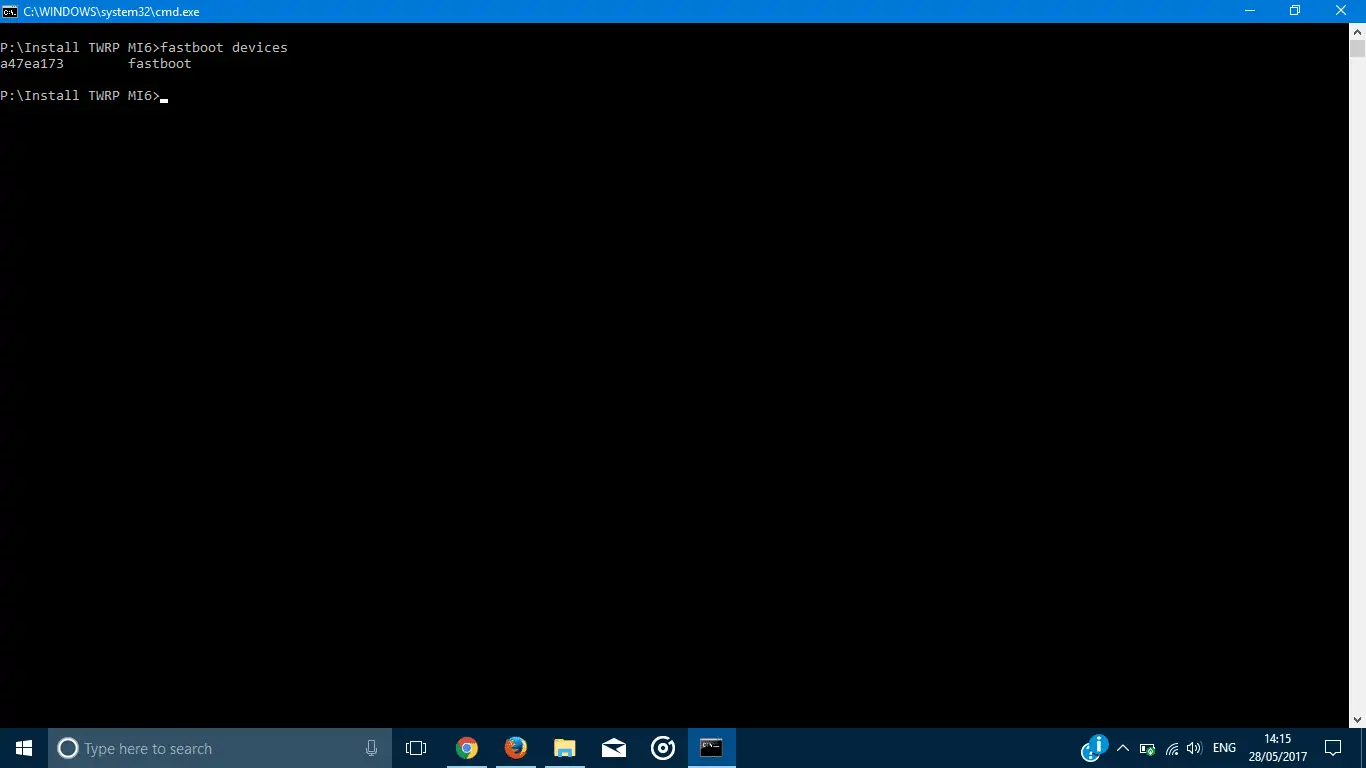
- If it was connected properly, then it will show the device serial number in the command window.
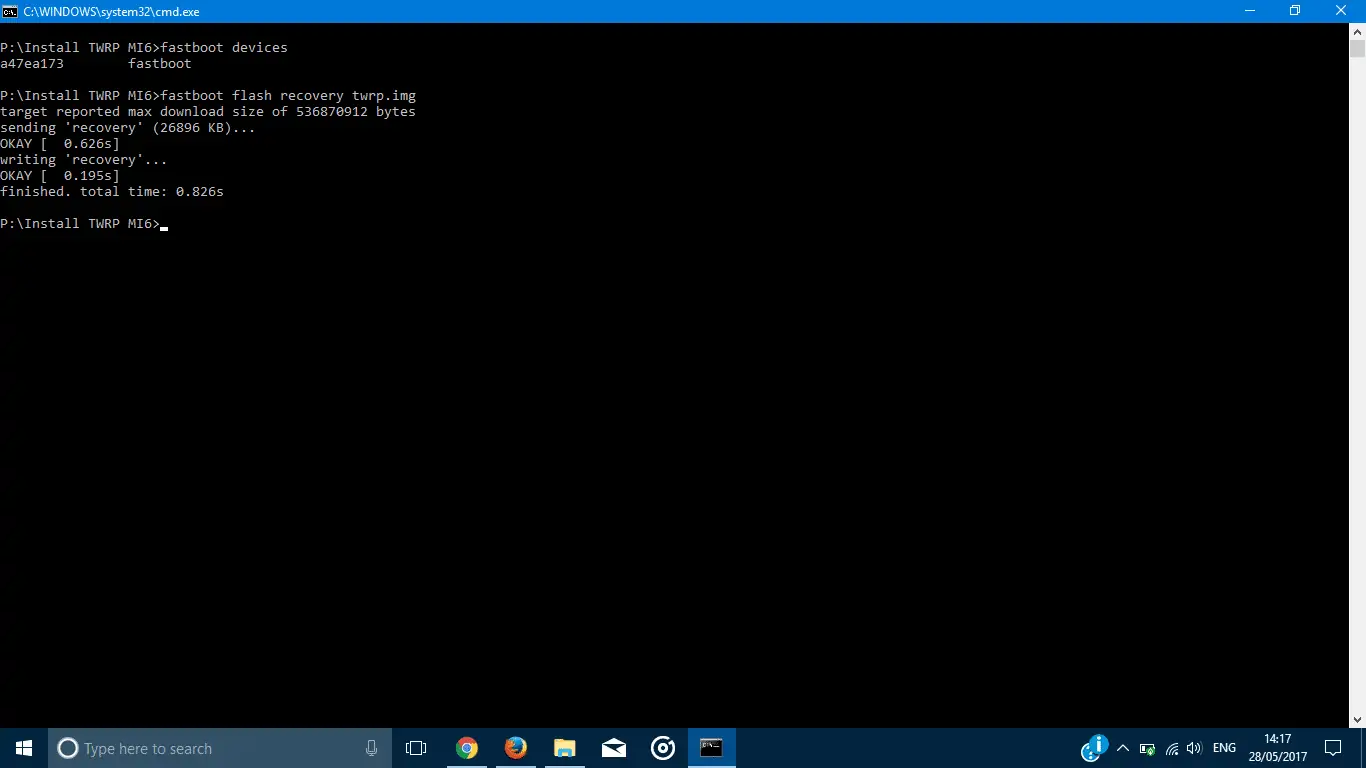
- Now, Install TWRP through command. Copy the below command and paste it on the Command window.
- It will take some time to complete the process. You need to Boot the phone into TWRP Recovery Mode by typing below command.
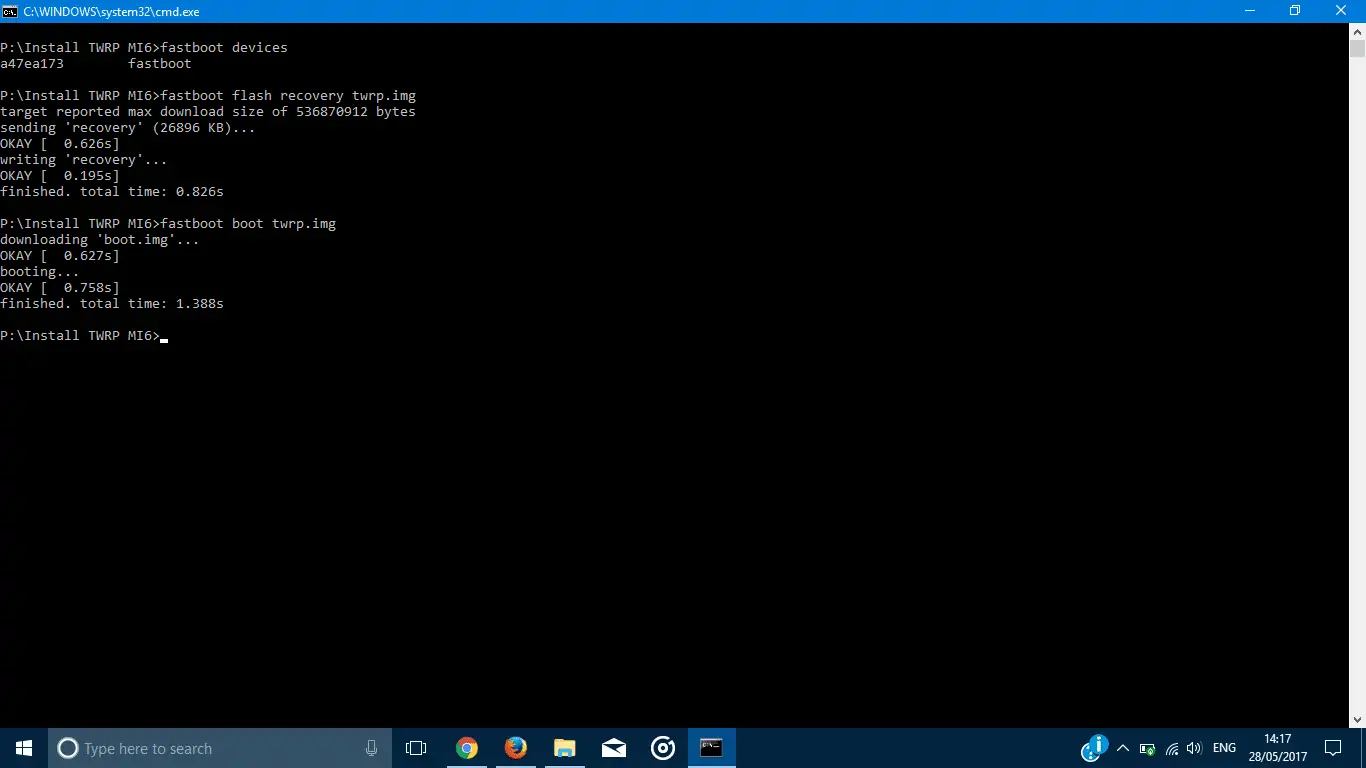
- It will switch your MI6 into TWRP Custom Recovery. That’s all for installing TWRP on your Device. To root your device follow below Steps.
How Root Xiaomi MI6 (sagit ) with Magisk Su
- Now, You are at TWRP home if you follow our above steps.
Note: If you have already Installed TWRP on your device before and want to root your device. Switch OFF your device and Turn it on by Press and Hold the Power button and Volume Up button simultaneously.
- Head over to Install Button on TWRP home and select no-verity-opt-encrypt-5.1.zip from where it was stored. Swipe to install it.
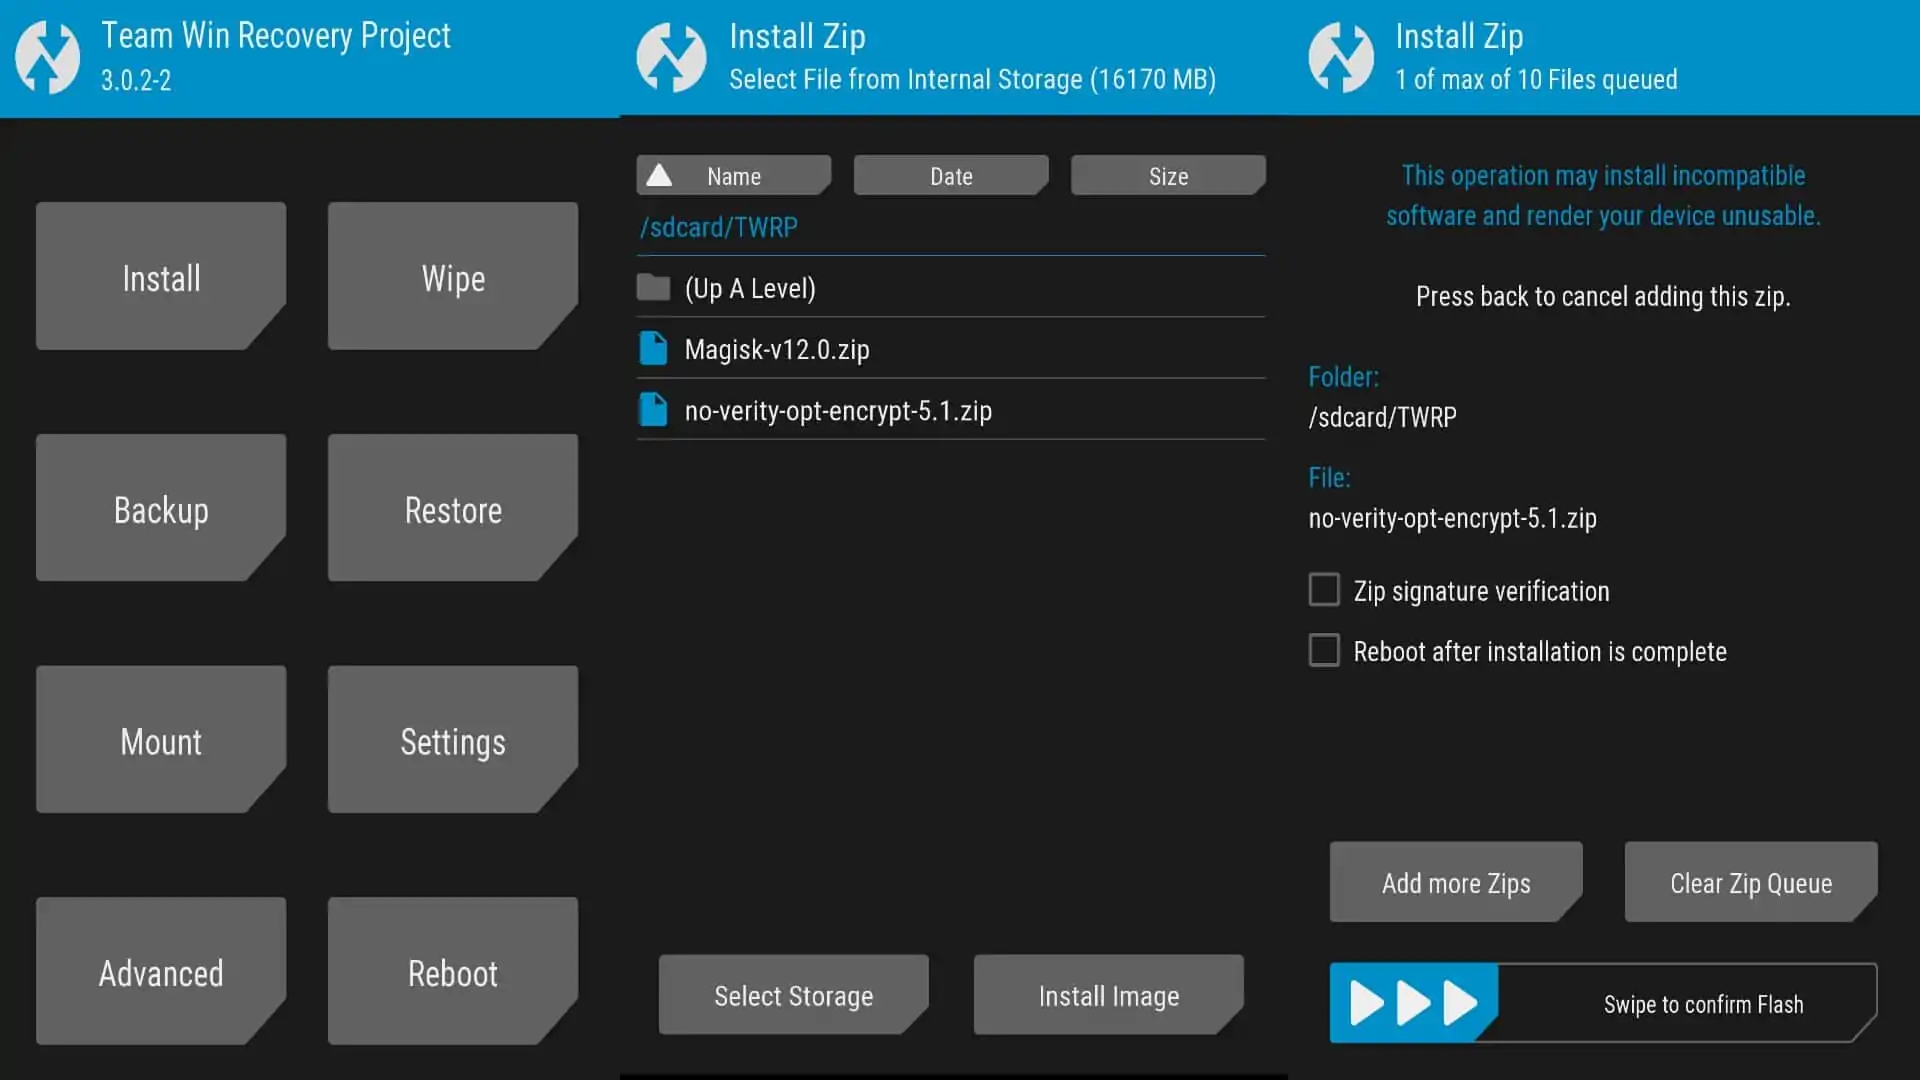
- Go back and Install Magisk.Zip as like the above one.
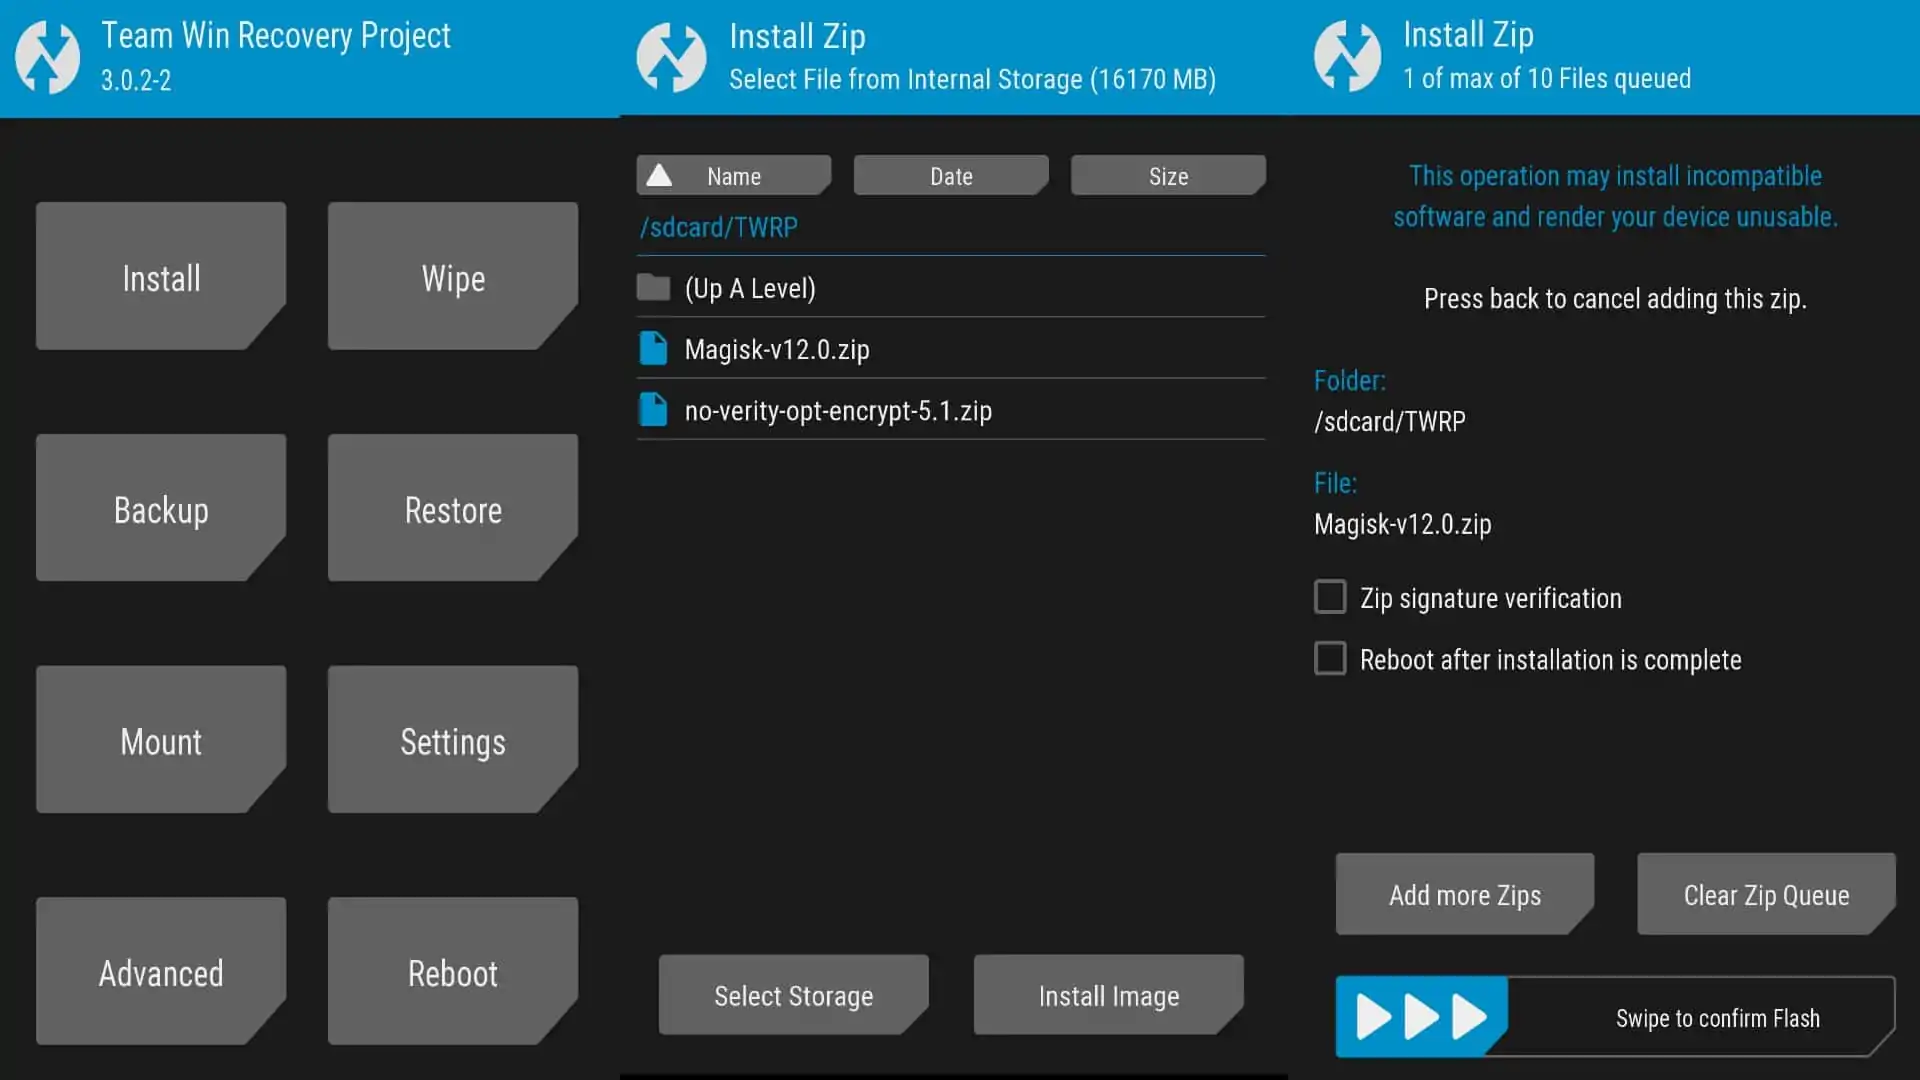
- You have successfully flashed no-verity-opt-encrypt-5.1.zip and root with Magisk. That’s all you need to do.
Final Words:
Now, you can install custom ROMs, Custom kernels and Run special apps which are not supported for non-rooted devices. From this, you will be only able to Root Xiomi Mi6 with Magisk root binaries. If you want to Root Xiaomi Mi6 with Super Su, download it from here and replace Magisk.zip with the SuperSu.Zip while flashing at TWRP.
I recommended you to Root Xiaomi Mi6 with Magisk instead of Super Su. because of Magisk won’t make any modifications on System partitions. Systemless Super Su is only available on Android 6.o. So, Proceed with Magisk.
Share this article and help us to grow.
Hi,
This does not work. It produces this error at the last step.
downloading ‘boot.img’…
OKAY [ 1.231s]
booting…
FAILED (remote: invalid kernel address: not lie in memory)
finished. total time: 1.247s
Please advice.
-aos.